Configuration on MikroTik RouterBoard for Vsol GPON OLT
Note
Router with Internet access
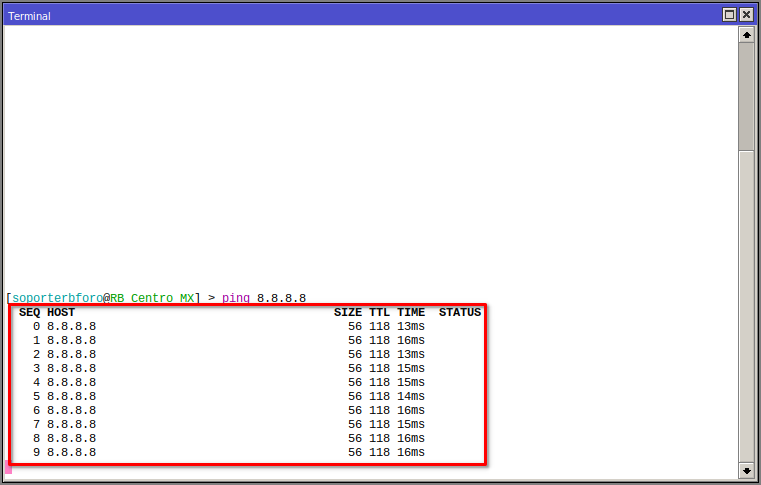
Connection via Ethernet port.
Bridge Creation
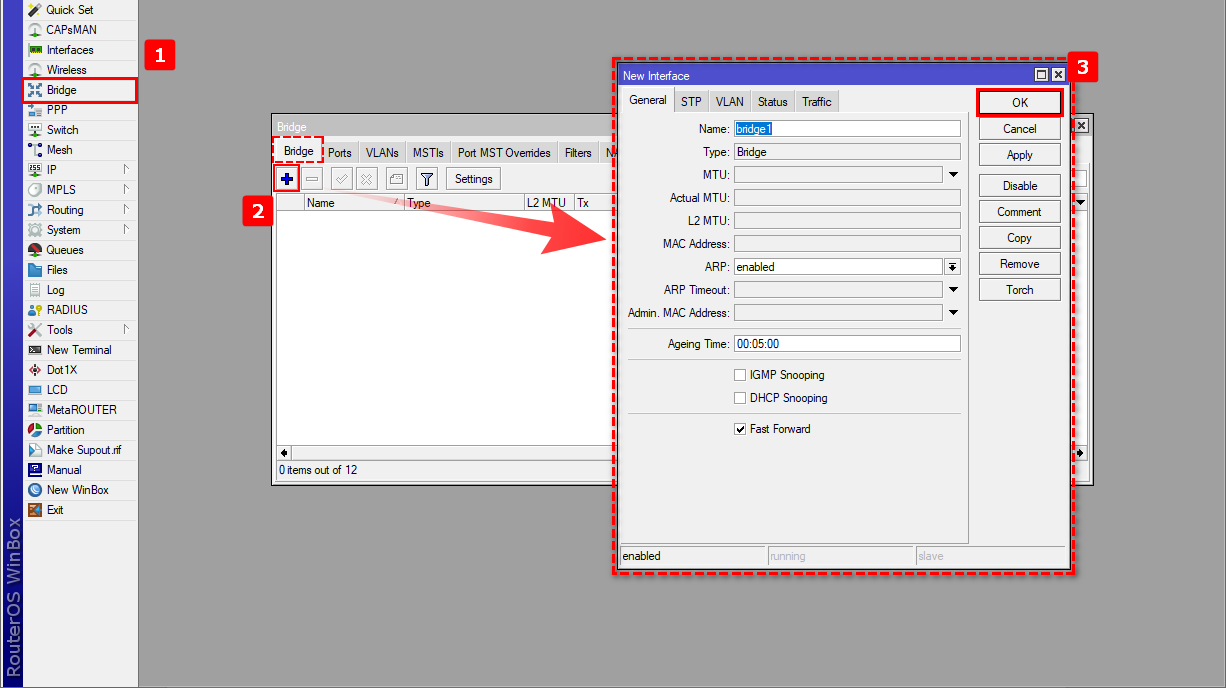
We are going to create a bridge to assign an IP from the default management network of the OLT and also be able to assign an IP when the default network is changed.
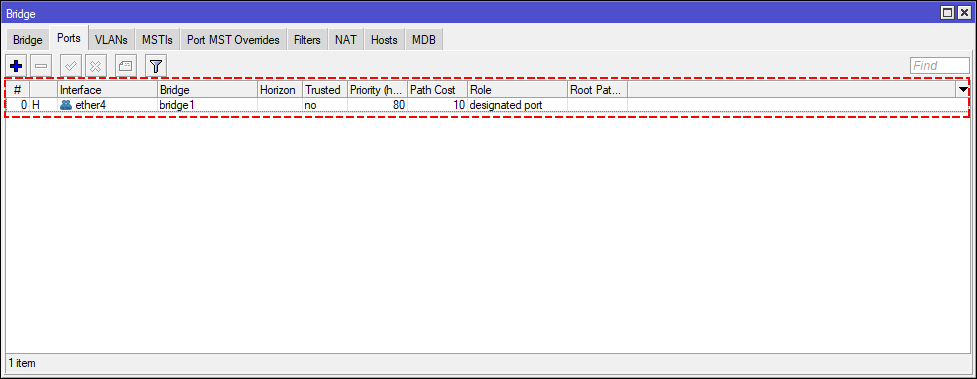
1 Go to the Bridge section in the RouterBoard menu to create the interface bridge1 to group the ports that will be working on the OLT network.
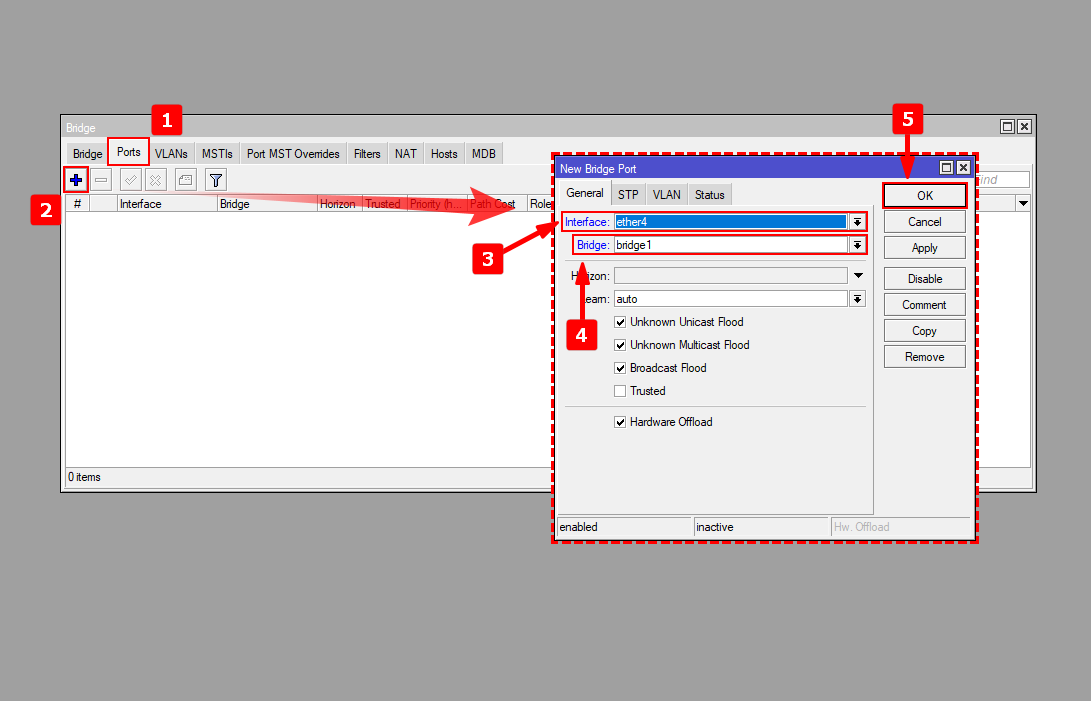
2 Assign the two ports connecting to the OLT to bridge1.
VLAN Creation for Hosts
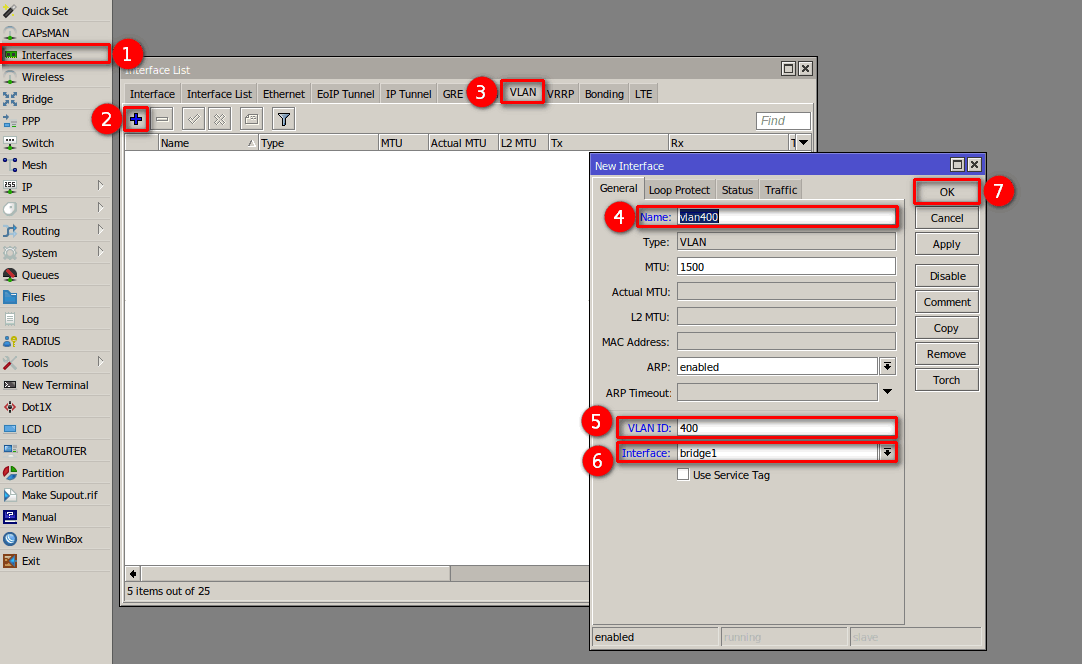
1 Go to the interface configurations and then to the VLAN section, where you will create a vlan named vlan400 with ID 400, where the subnet for the hosts will be created.
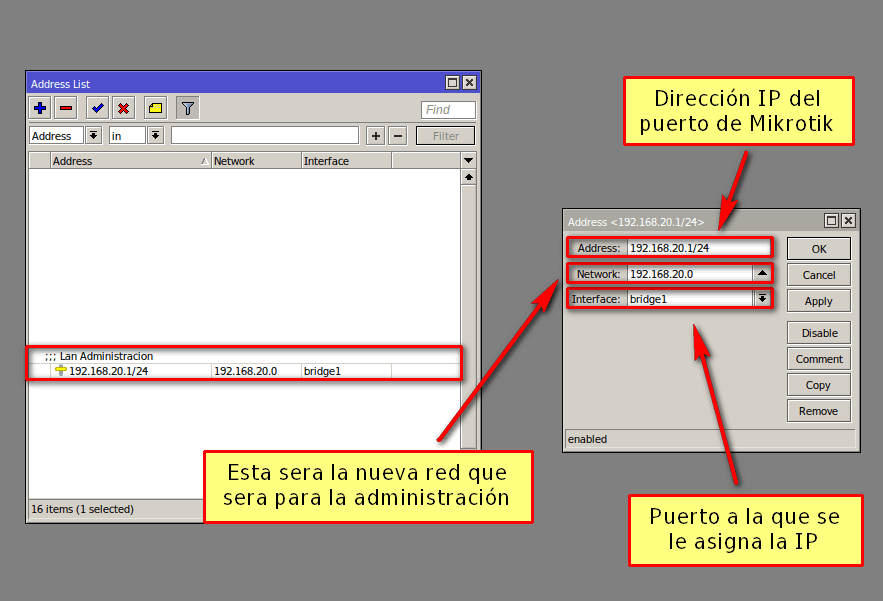
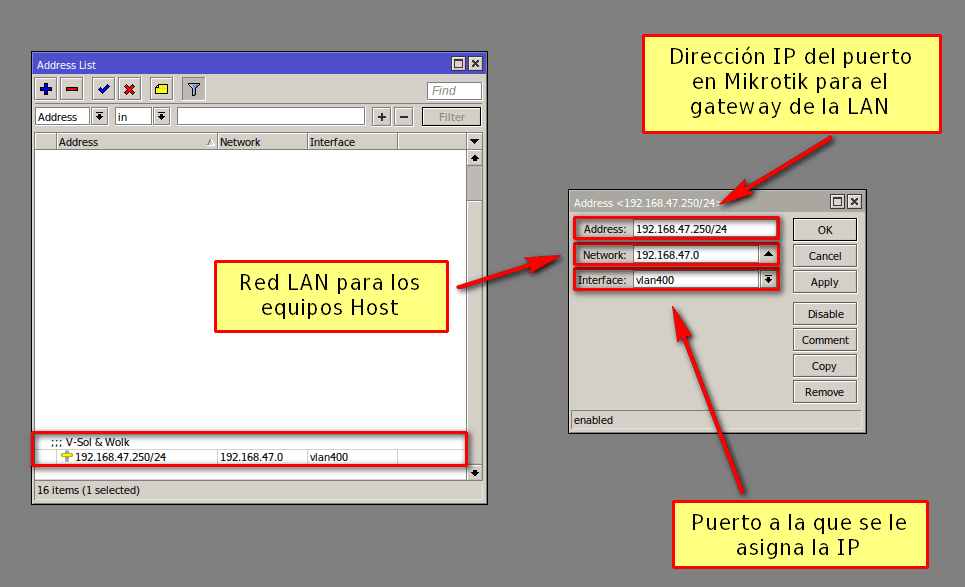
IP Addressing
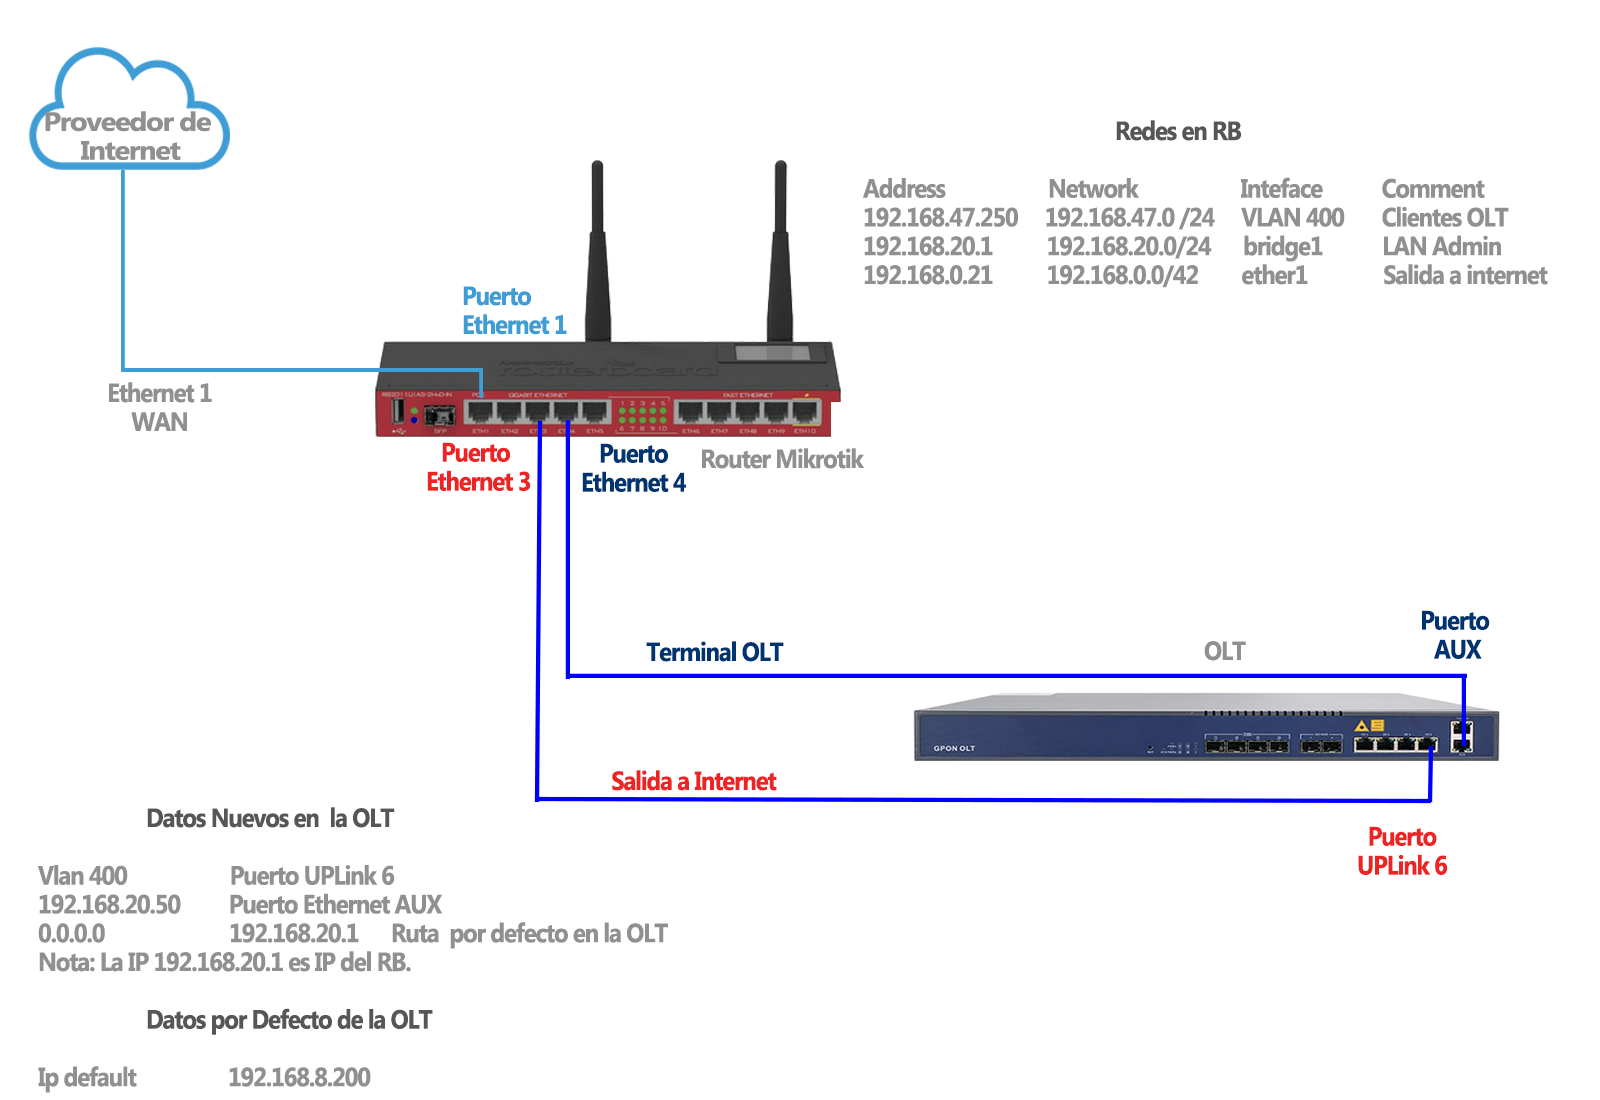
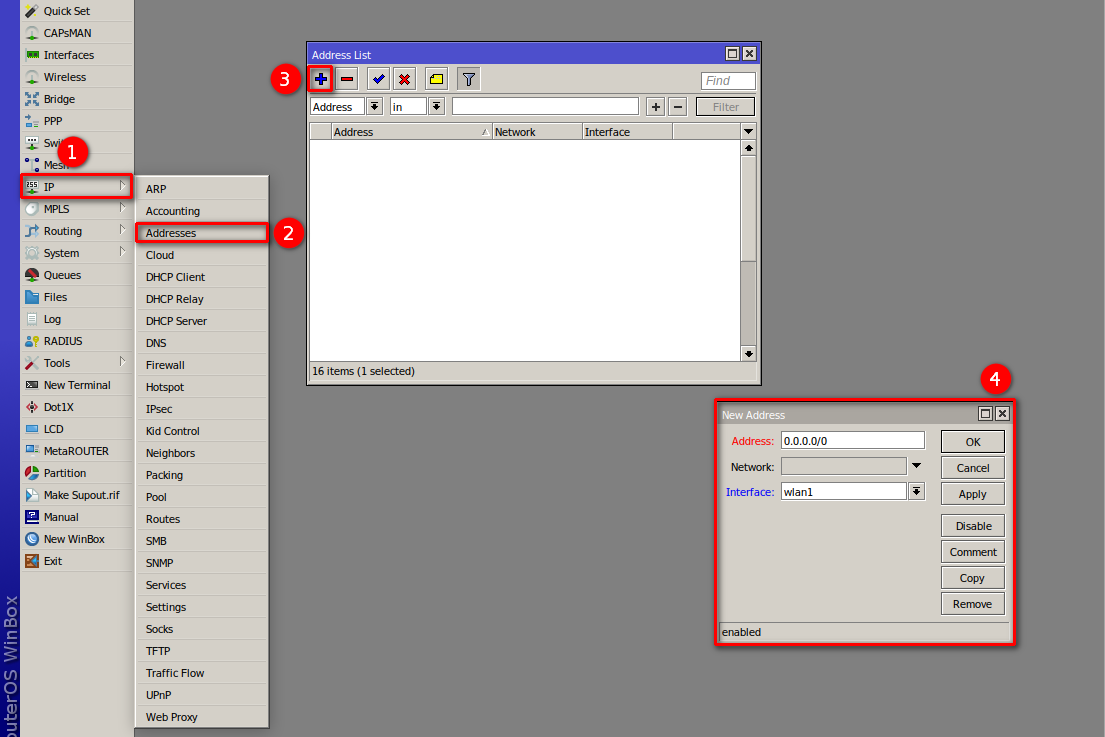
1 Assign an IP Address to each interface as shown in the following images, based on the initial manual topology.
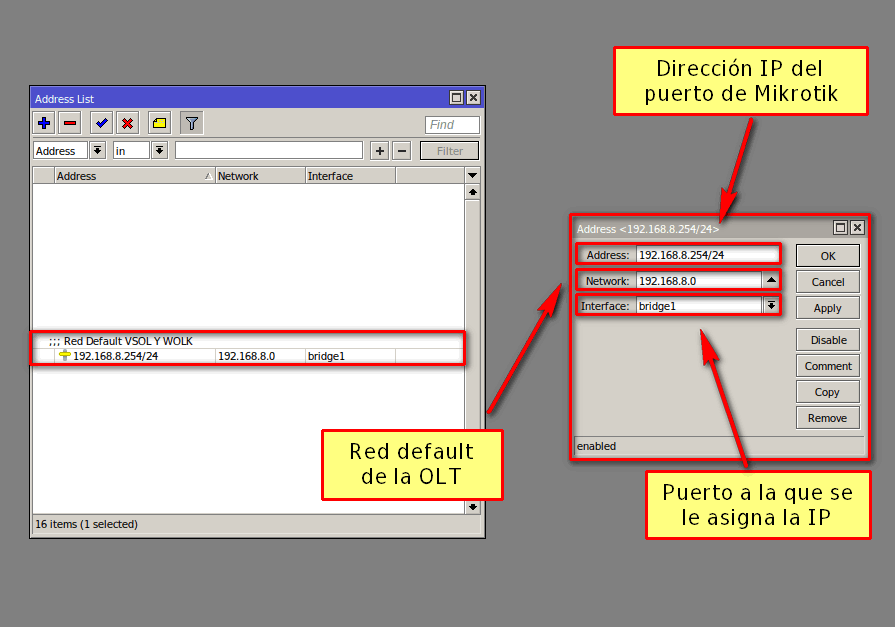
2 IP Addressing for the default management network. This is the network that comes in new Vsol OLTs or when they are reset to default values. This IP will only be used to connect to the equipment for the first time, as we will later change it to our management network during OLT configuration.
3 IP Addressing for management network. This will be the IP we use to work on our new management network.
4 LAN IP Addressing for OLT Vsol. This address will be the Gateway of the LAN network for Hosts (ONUs) of Vlan110, to provide addressing either statically, via DHCP, or through a PPPoE server.
Next Step
April 12, 2024, 3:32 p.m. - Visitas: 43509